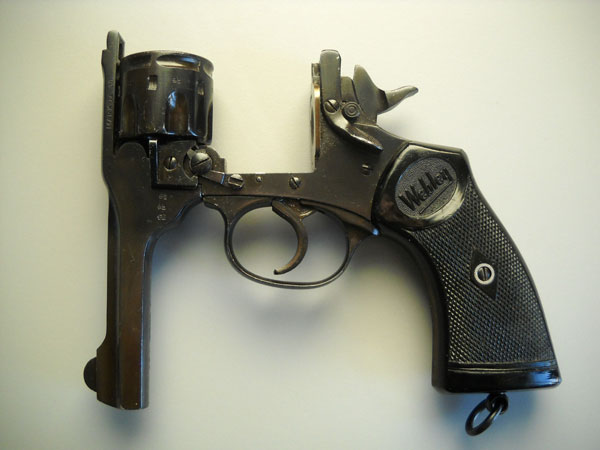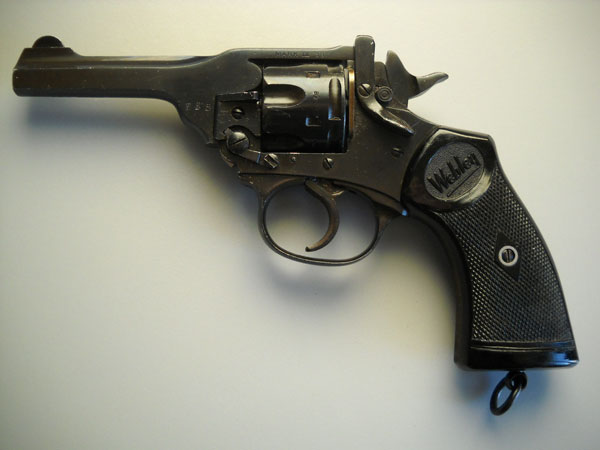
Detailed Disassembly and Reassembly of the Webley Mark IV .38 Revolver
This example was made in 1954 by Webley & Scott, Ltd., Birmingham, for the Hong Kong police.
It's easy enough to disassemble the Mark IV, if you have the right tools.
|
|
Detailed Disassembly and Reassembly of the Webley Mark IV .38 RevolverThis example was made in 1954 by Webley & Scott, Ltd., Birmingham, for the Hong Kong police. It's easy enough to disassemble the Mark IV, if you have the right tools. |
|
|
Press the latch lever and open the pistol. Remove any cartridges. |
|
|
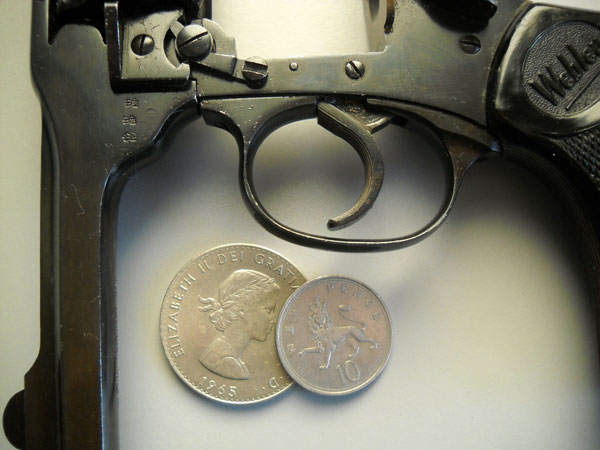
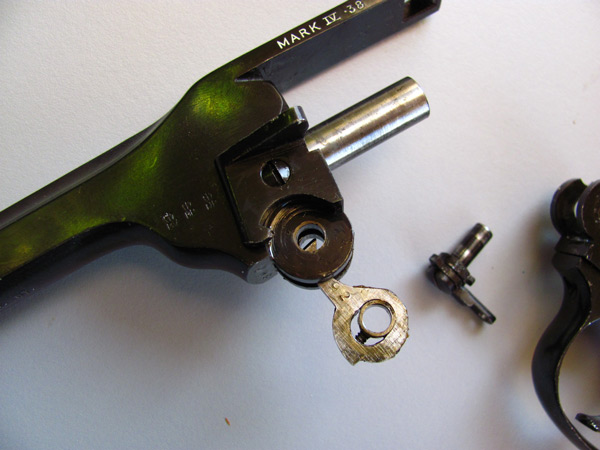
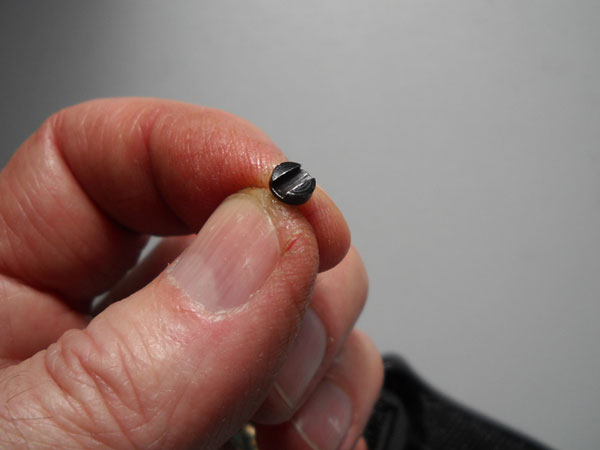
Select the proper tool to remove the cam lever lock screw. A crown is much too thick, and besides, they aren't common these days. A ten pence is also too thick. |
|
|
A shilling is the ideal tool, but a two pence works just fine, and is much cheaper. Remove the cam lever lock screw completely. |
|
|
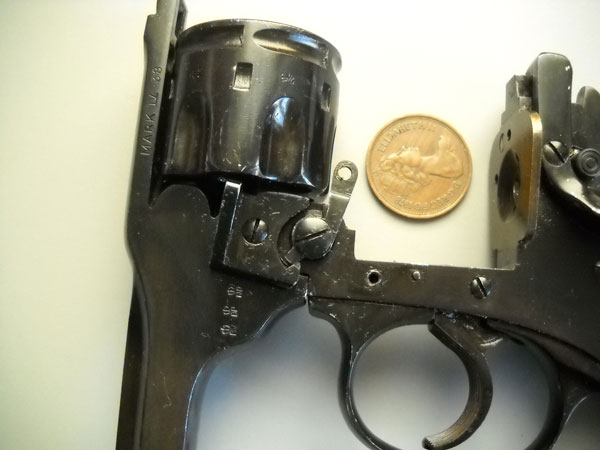
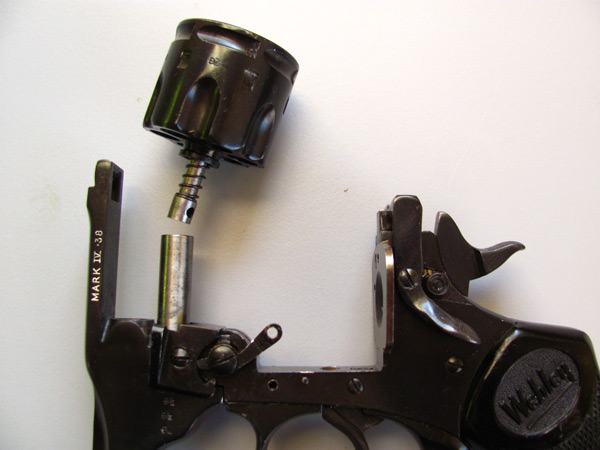
Rotate the cam lever upward. The cylinder retaining cam rotates clockwise to release the cylinder flange. |
|
|
Now the cylinder assembly slides out. |
|
|
This is all you need to do for routine cleaning. |
Complete Dissassembly
|
|
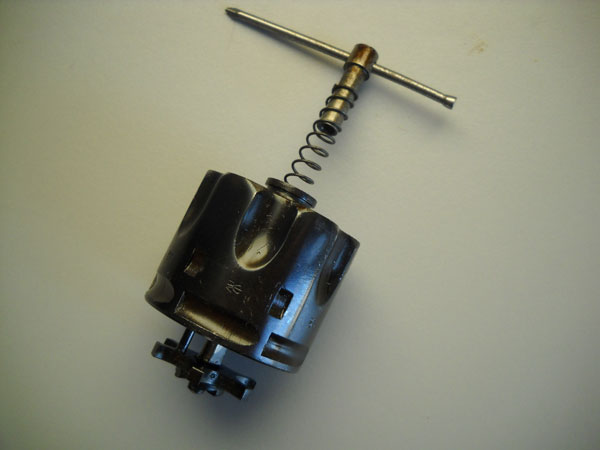
Put a nail through the hole in the extractor nut and use it to turn the extractor nut off the extractor shaft. The extractor shaft is flat on two sides so it won't rotate in the cylinder. The cylinder, extractor, extractor spring, and extractor nut come apart. |
|
|
Remove the hinge pin screw from the right side. |
|
|
Push the hinge pin out toward the left. |
|
|
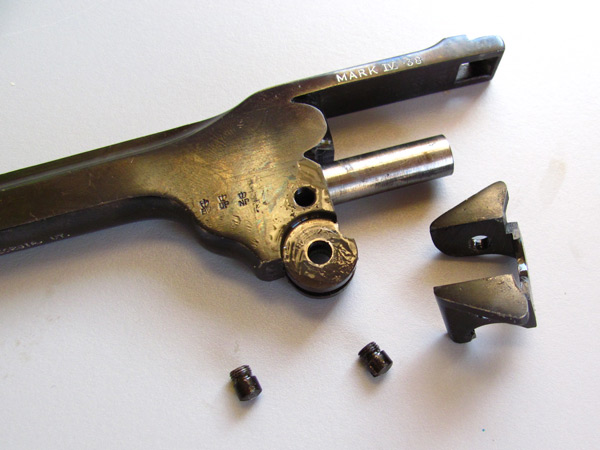
Remove the barrel, and pull out the extractor lever. |
|
|
Unscrew the two cylinder cam screws and remove the cylinder cam from the barrel. |
|
|
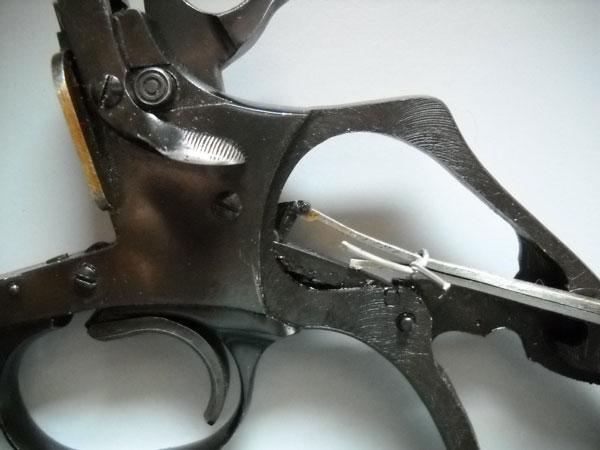
Remove the grip screws and grips. The mainspring must be compressed to remove it, however it's very strong. An easy way to remove it is to cock the pistol to compress the mainspring, and then twist a piece of wire around it to hold it in compression. Then decock the hammer and lift the mainspring out. Pay attention to how it engages with the hammer swivel. |
|
|
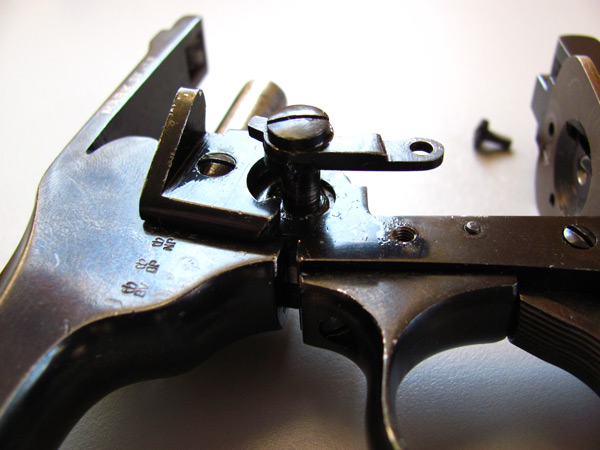
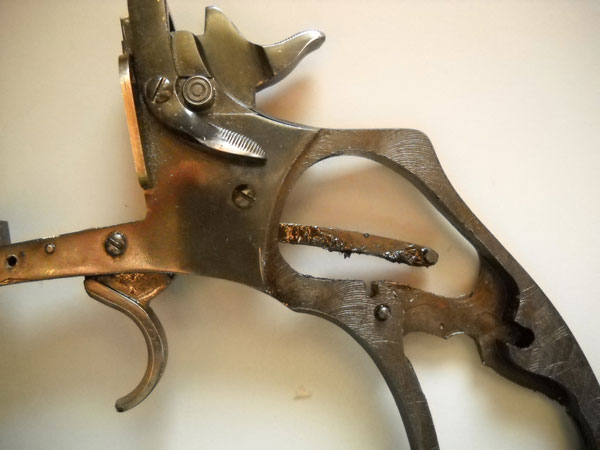
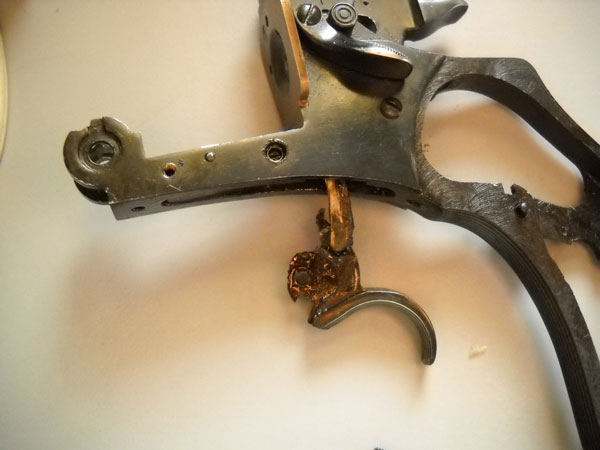
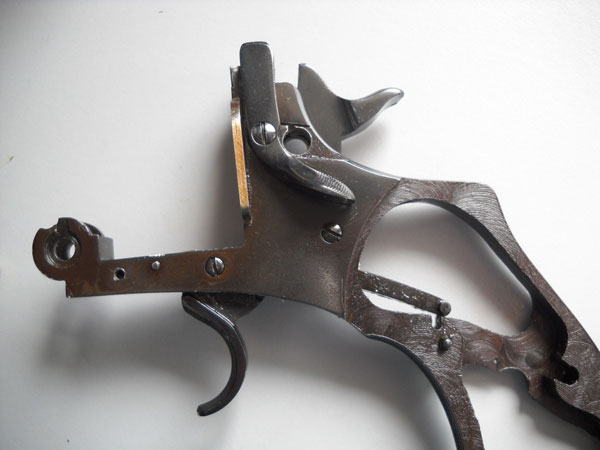
Lift out the mainspring lever. Remove the trigger guard. |
|
|
Remove the trigger screw, and the trigger and hand drop out. Isn't cosmoline the greatest thing? I love how it smells. |
|
|
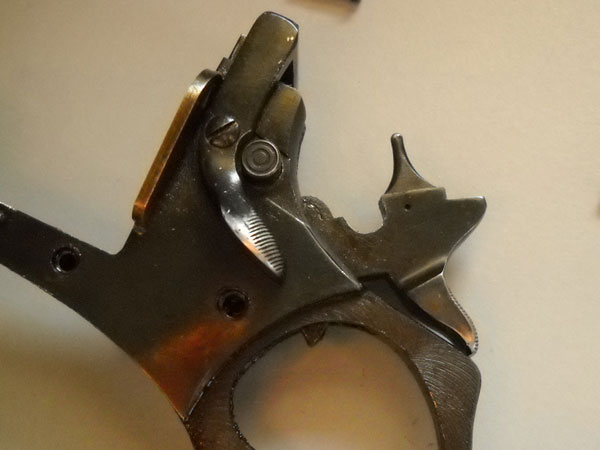
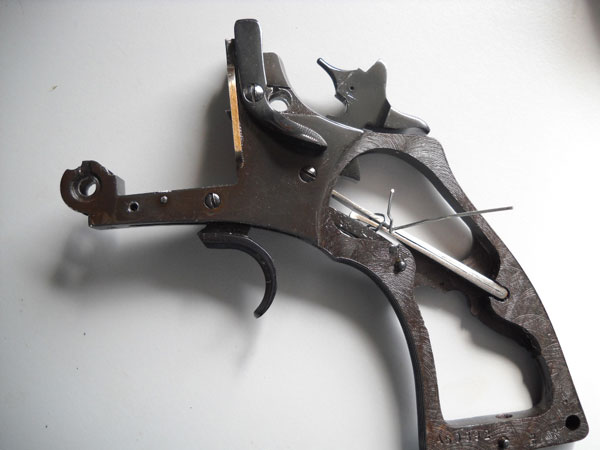
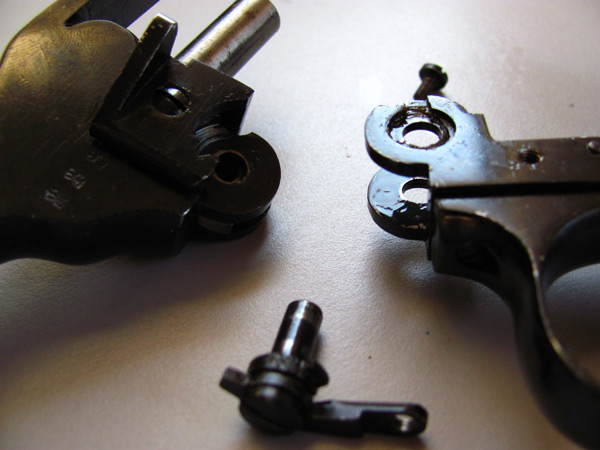
Your Webley may have been desecrated with a pointless slide-bolt safety. The malignant safety is held in place by a spring-loaded pin, which lies under a set screw, in a hole thoughtlessly drilled and tapped into the top of the frame. The set screw is glued in and can be quite difficult to remove without stripping it. Soak it with oil for a while and turn it out with a tight-fitting 0.050" hex wrench. Fish out the spring and pin, and the disgusting safety slides out. Remove the hammer screw and lift out the disfigured hammer. The hammer can be further disassembled, but I'd rather not. Compress the barrel catch spring against the recoil shield, unscrew the barrel catch screw, and slide the barrel catch off to the rear. |
|
|
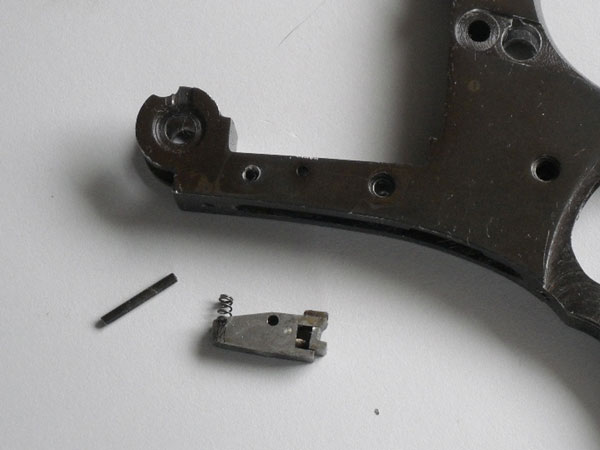
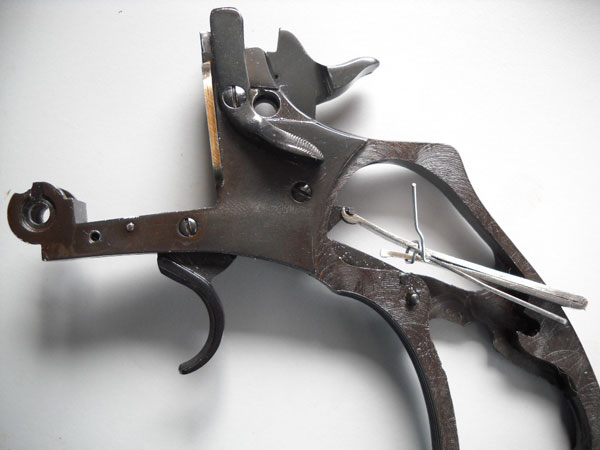
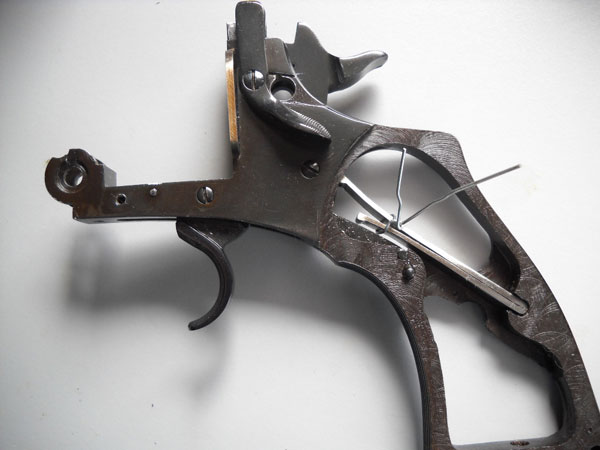
With a 1/16-inch punch, drive the bolt pin out to the left, and remove the bolt and bolt spring. The bolt can also be further disassembled, but again, I'd rather not. |
|
|
Use a brass hammer to tap the recoil shield out to the left, after removing its screw. The recoil shield has a nice brown finish on it that's easily damaged by Hoppe's No. 9 solvent. Maybe it's just cured cosmoline; I don't know. But I'd clean it with oil, if I had it to do over again. |
|
I smoothed the indentations on the repulsive cross-bolt safety to make its operation less offensive, cleaned everything, polished some of the parts and and re-blued them in my 125 mL stove-top stainless-steel hot-blue beaker, and we now reassemble the pistol. Reassembly is pretty much the reverse of disassembly, and it's so easy, an Englishman could do it. I'll show you a few things I learned that make it even easier. Remember, if you choose to work on your own gun, I don't accept responsibility if things go badly. I don't claim that my method is correct. All I can say with assurance is that my pictures are pretty good. |
|
|
After the hammer and trigger are installed, the mainspring lever slides in. The hammer should be down and the trigger all the way forward. The hammer swivel should be up and out of the way. |
|
|
If you want to work on the mainspring while it's out, squeeze its ends together in a vise and remove the wire. Do the same to tie it up again for instalation. Hook the upper end of the mainspring in the hammer swivel. |
|
|
Then drop the mainspring into place. |
|
|
Cock the hammer to compress the mainspring before you remove the wire. Then let the hammer down again. At this point, the hammer and trigger should work together as usual. |
|
|
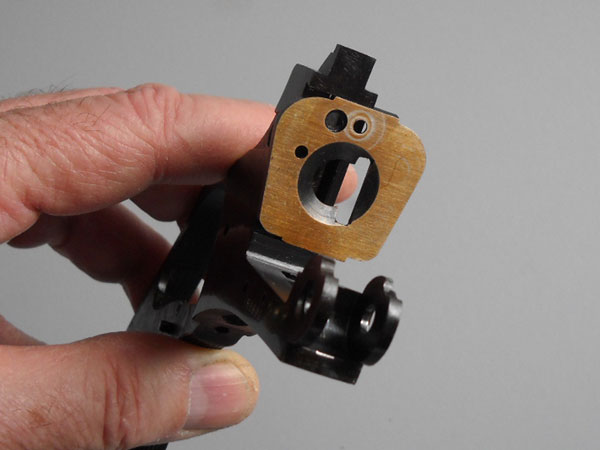
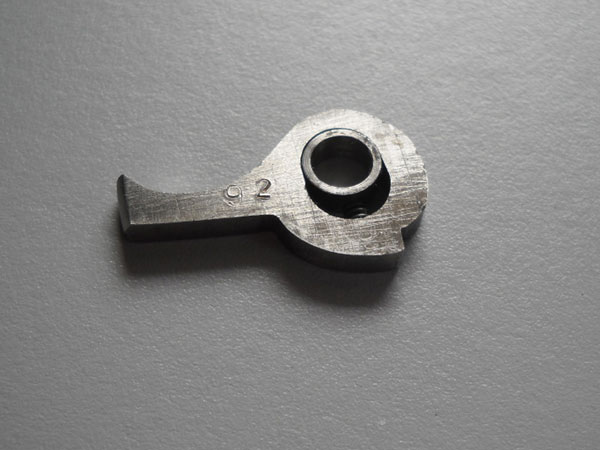
Now we put the barrel assembly together. This shows how the extractor lever is assembled, and how the important parts are numbered. The Webley is all nicely hand-fitted. |
|
|
Install the cylinder retaining cam, and then the extractor lever. |
|
|
Notice how the frame has a slot to receive the tab on the hinge pin. Remember to orient the hinge pin before you install it, but we won't do that just yet... |
|
|
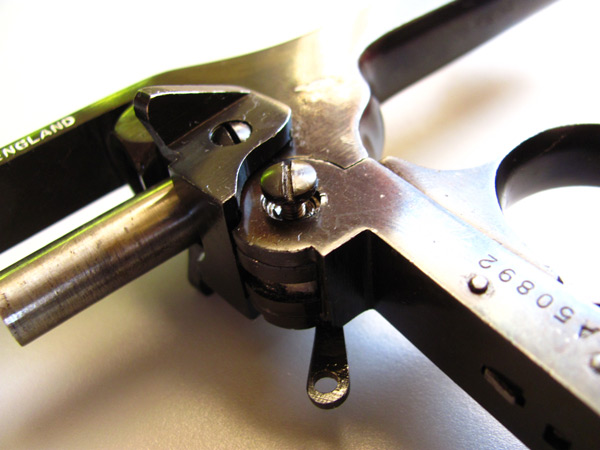
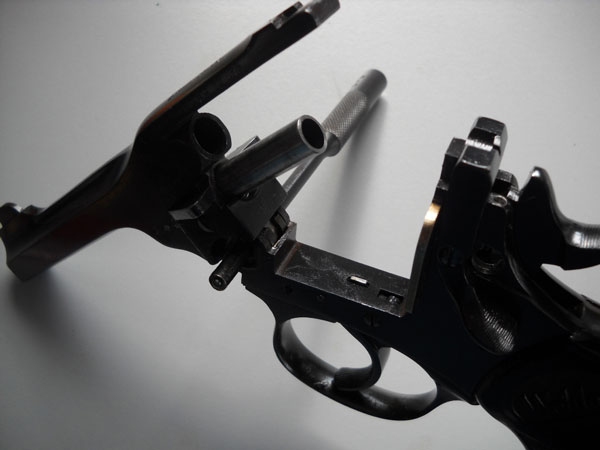
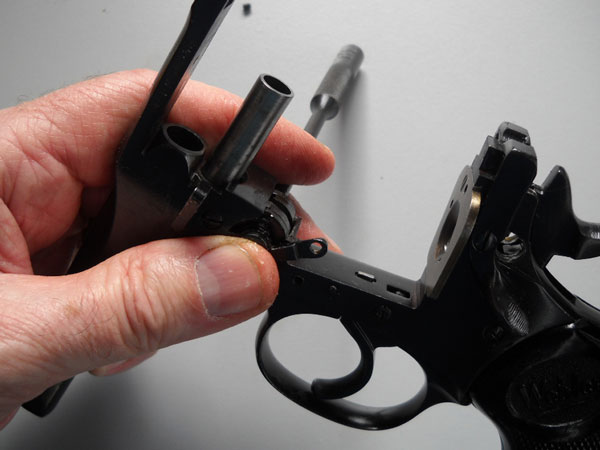
It's a bit tricky to get the barrel assembly back on, because the extractor lever doesn't want to let the hinge pin go in. The hinge pin is a very precise (but not tight) fit. I used a 3/16 roll pin punch to align all the parts... |
|
|
...and then pushed the hinge pin in as the punch came out. Be sure the hinge pin is aligned with its tab in the slot on the left side and reinstall the hinge pin screw on the right side. Then install the cylinder assembly and turn the cam lever down to line up the holes for the screw. |
|
|
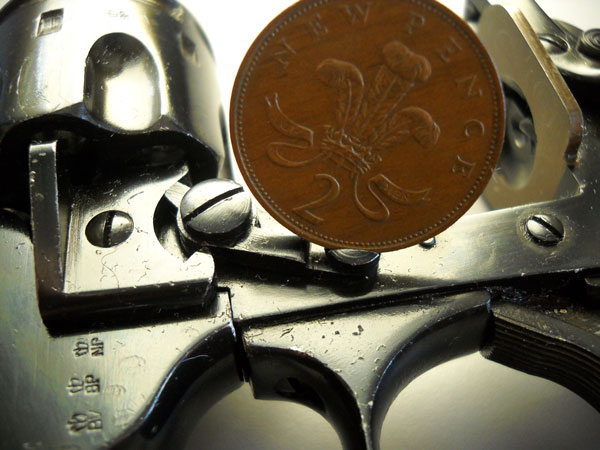
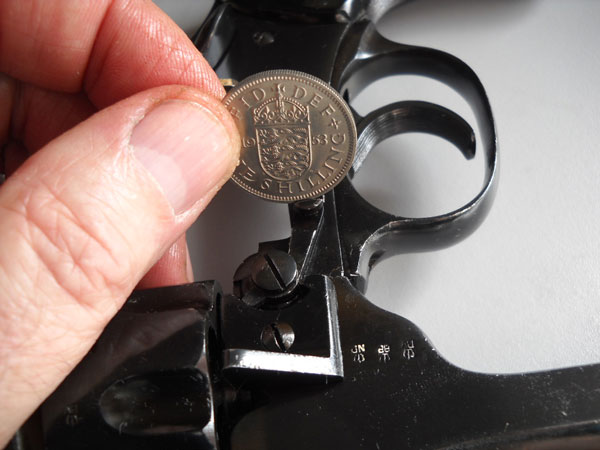
Close inspection reveals that the cam lever lock screw really is designed to be turned with a coin: the slot is curved. |
|
|
So I like to do it up right with a real shilling, which happens to be from almost the same year as the revolver. It fits the slot perfectly. |
|
|
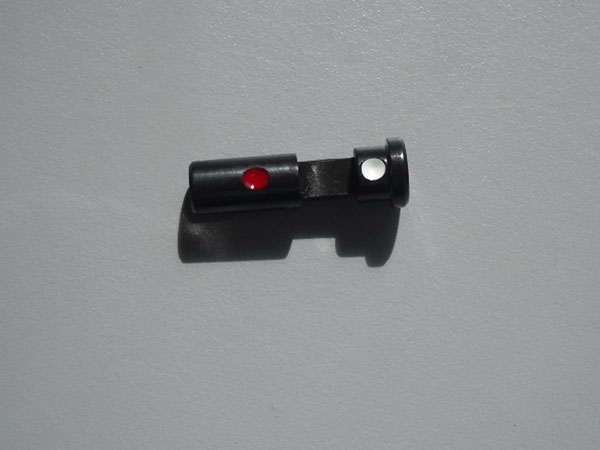
I smoothed and polished certain parts of the superfluous safety to make it work more smoothly, re-blued it, and since it's not an original part anyway, painted the dots red and white. |
|
|
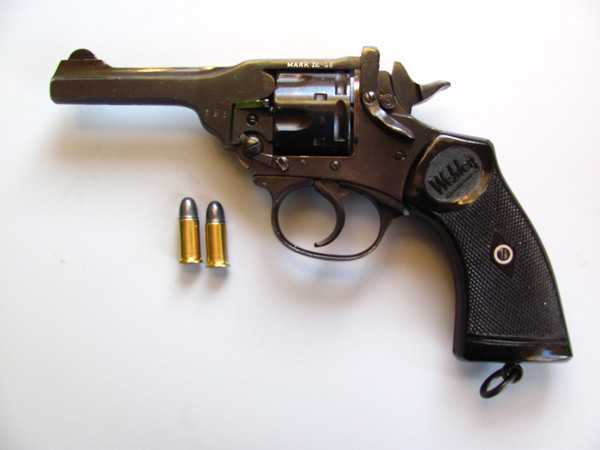
Here's the old Webley, all clean and shiny. |
|
|
You can't buy new .38/200 cartridges, but hard-to-find .38 S&W fits just fine. Brass and bullets are available, so I load my own. These were made with Starline 38 S&W brass, Magtech 146 gr 38 S&W lead round nose (LRN) bullets (0.361 inch), and 2.5 gr Winchester 231 powder. |
© 2010 Porter Rockwell